JUNE 1st 1945 – ATTACK RESEARCH
INTRODUCTION & THANKS
When our friend Peter Walker had researched the full history of the Suddhadib (a.k.a. Hardeep Wreck), the findings that he unearthed were a revelation to all divers who had known the wreck only as an exciting, but rather anonymous dive site.
(Find all of Peter’s research in his excellently produced video on his own website www.peterwalkerphoto.net).
To me it was an inspiration to one day fully visualize the events specifically of the day of the attack and the sinking. After many months of work, this set of 29 visuals is finally completed.
I am happy to not only present all of you with the pictures but also this wealth of additional details that had to be dug up for the production.
Next to Peter’s consultation in this “Suddhadib Attack” project, my sincerest thanks also extend to two other friends who helped greatly with their expertise, Brock Wright (aviations expert working for Bell Helicopters) and Steve Burton (wreck diving authority and owner of www.thaiwreckdiver.com), both of whom with hundreds of Hardeep dives under their belts (… weight belts).

STARTING POINTS
HISTORICAL RESOURCES
-
Peter’s research
-
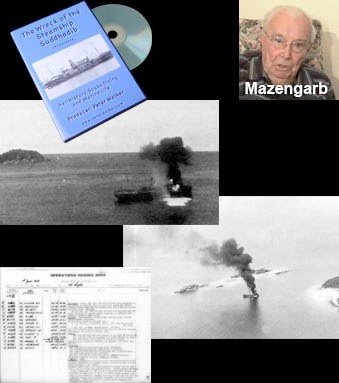
the interview with one of the pilots, Max Mazengarb and his descriptions of the attack (contained in Peter’s video)
-
the operations record book of the attack which lists pilot names, times, weather conditions, bomb details and a description of the attack
-
2 photographs taken out of the B-24 bombers during the attack, one of the Suddhadib hit and another one of the ship burning and sinking
-
various details researched on the internet which are listed in respect with the individual pictures below
VISUAL RESOURCES
-
my 3D model of the Suddhadib modeled to scale after measurements taken off the wreck
-
a 3D model of a B-24 bomber on which I changed the paint job and markings
-
location references from Google Earth (shape, scale, orientation of landscape and objects)
1) WHO SANK THE SUDDHADIB?
click to enlarge
-
The British RAF (Royal Air Force) with 2 bomber squadrons
-
RAF B-24 Liberator Squadrons 99 and 159
-
planes piloted by allied British, American and Australian pilots
2) WHEN AND WHERE DID THE ATTACK LAUNCH?
click to enlarge
-
1st June 1945
-
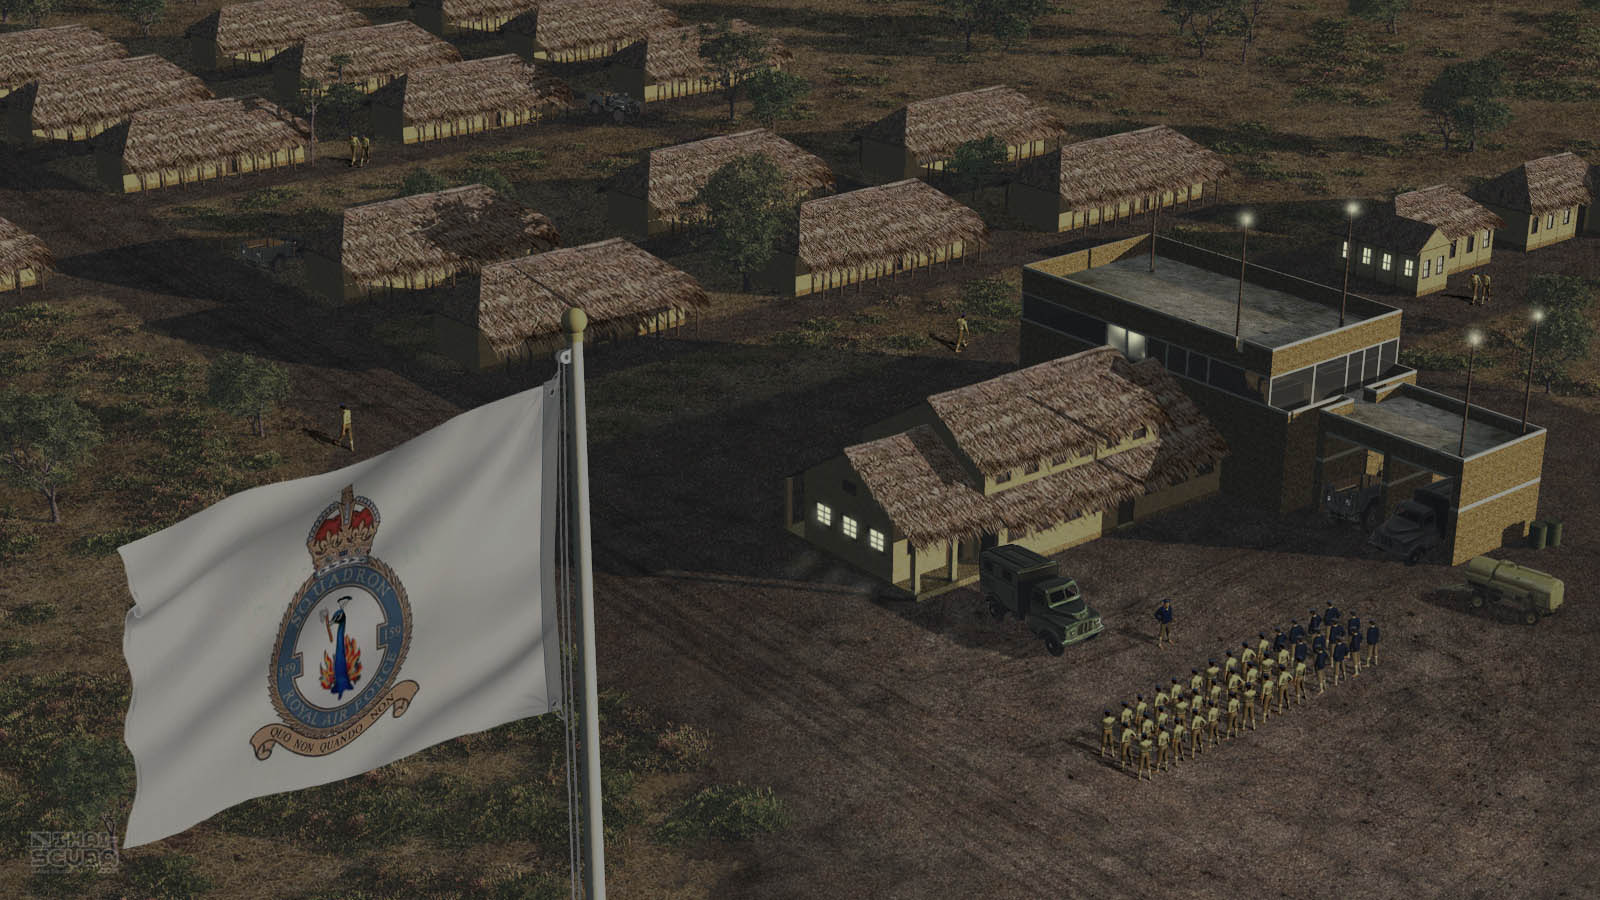
the B-24 Liberator Squadrons were stationed at the airfield Digri near Calcutta, West Bengal (India)
-
the area of West Bengal was ideal for placing airfields as the entire terrain is virtually flat with sparse vegetation
-
Digri was only one of many WW2 RAF airfields in that area next to airfields at Kalikunda, Dudhkundi, Piardoba, Salboni, Salua, Hijli, and Chakula
Check out the history as well as historical and modern pictures of the airfields at the website www.midnapore.in.
[all visuals here courtesy of www.rafb24.com]
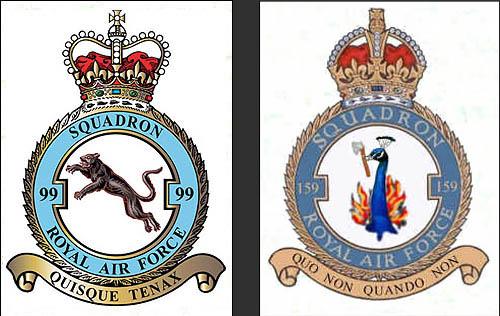
emblems of the Squadrons 99 and 159

typical barrack design | (photo by Thomas Oliver)

design of the operations building and flight tower | (photo by Thomas Oliver)
3) WHAT WAS LIFE LIKE AT A WW2 RAF AIRFIELD?

click to enlarge
-
buildings were built with locally available construction materials
-
outside the barracks area there probably wasn’t a whole lot of entertainment for the air men
-
in circumstances like these I would assume that the comradery amongst the men was very strong and friendships forged during these days lasted for a lifetime
-
any ordered air attack was a highlight and remained in the men’s memories in vivid detail until high age (see interview with pilot Max Mazengarb)
Check out an excellent source of information and historic pictures about all RAF Liberator Squadrons at www.rafb24.com.
[all visuals here courtesy of www.rafb24.com]
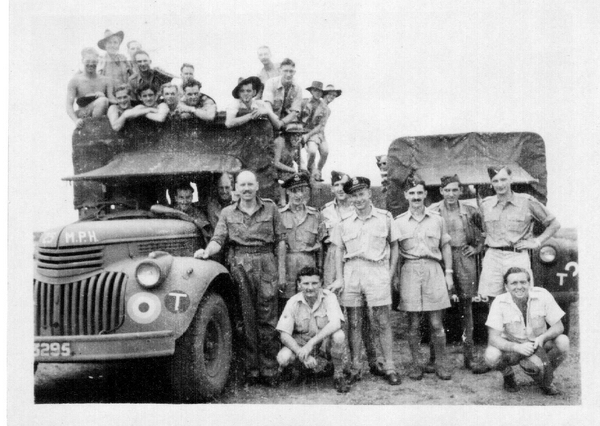
members of Squadron 159 | (photo by Matt Poole)

pilots posing in front of a B-24 bomber (we assume they were wearing long pants for the attack flight) | (photo by Matt Poole)
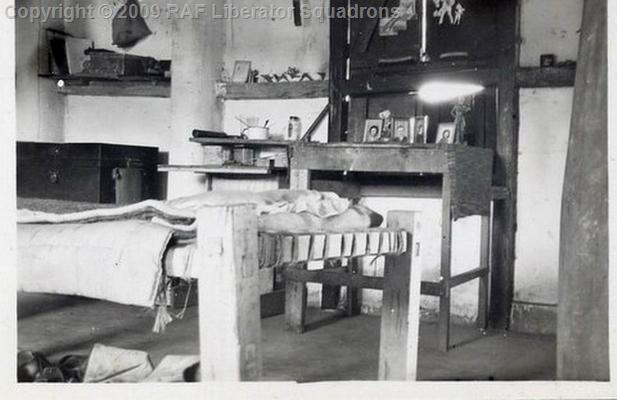
the bed space of ground crew member Thomas Oliver | (photo by Thomas Oliver)
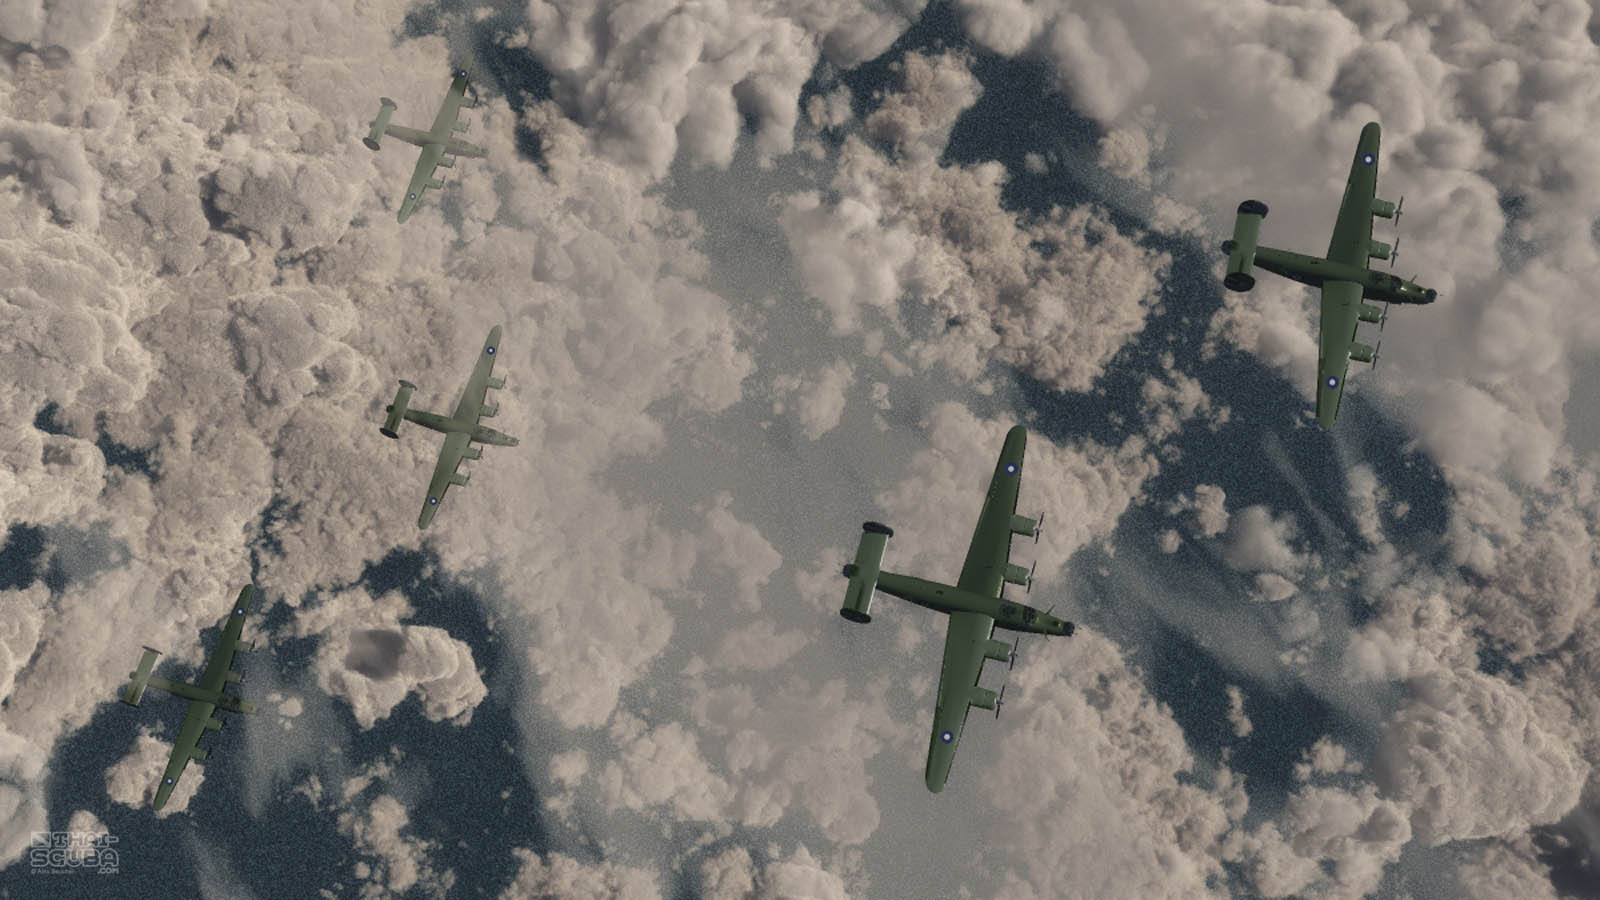
4) HOW MANY PLANES WERE INVOLVED IN THE ATTACK?

click to enlarge
-
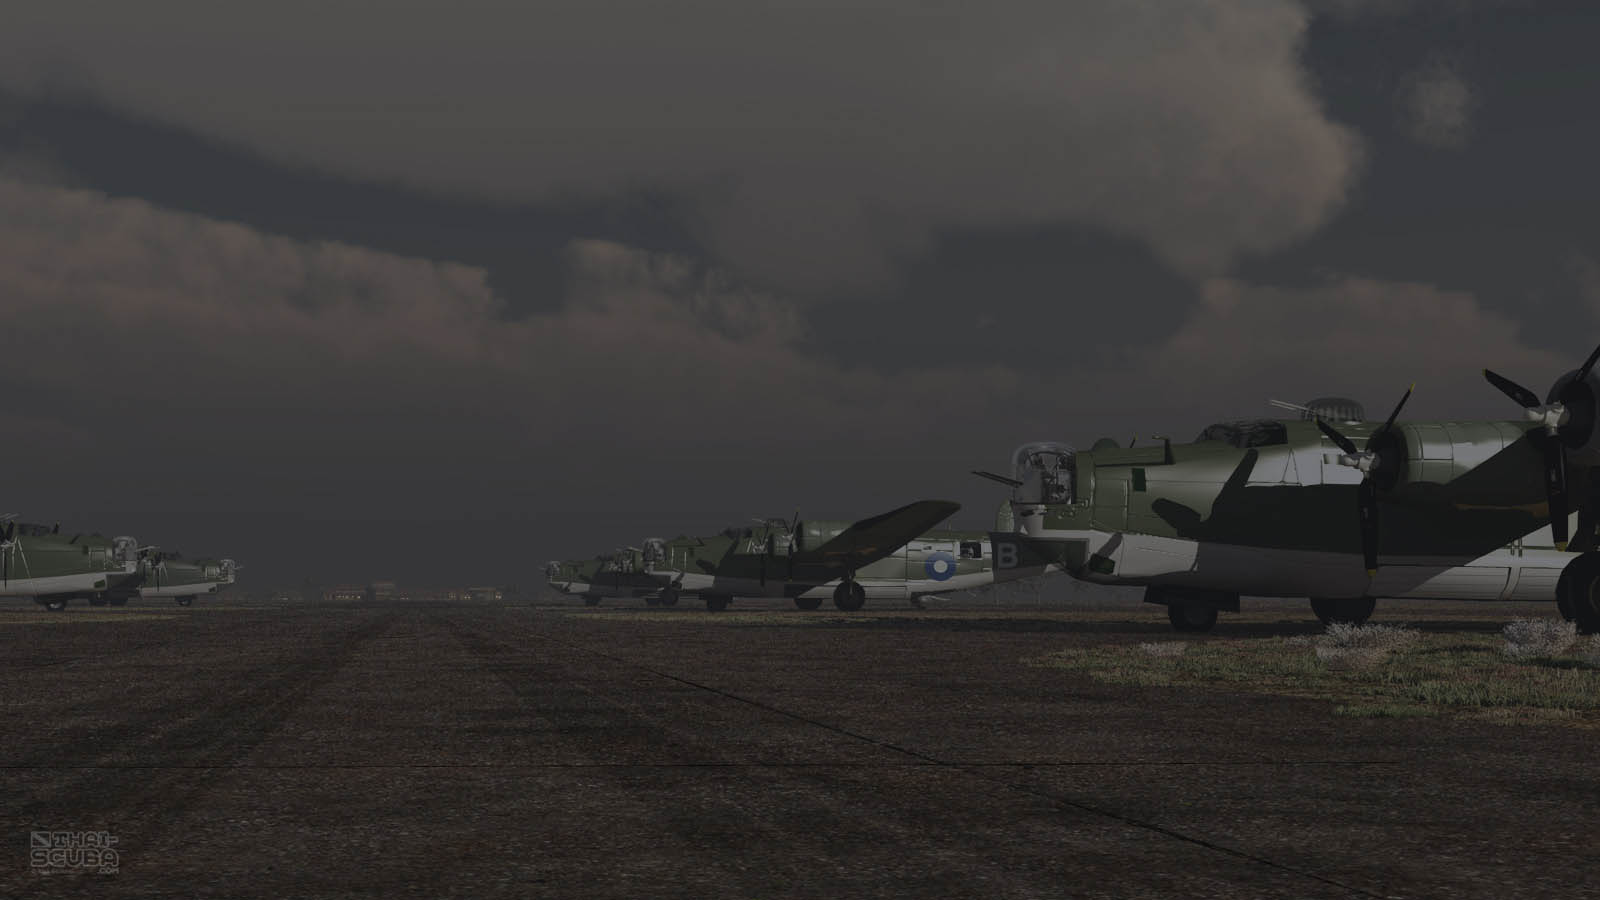
Squadron 99 flew out with a total of 10 bombers
-
Squadron 159 launched with 13 bombers, plane 14 failed to take off
-
each Squadron was divided into 3 sections:
-> high altitude bombers
-> low altitude bombers
-> mine layers
- the picture shows how each plane successively moves from their parking positions onto the taxiway
VISIT THE AIR FIELD IN GOOGLE MAPS!
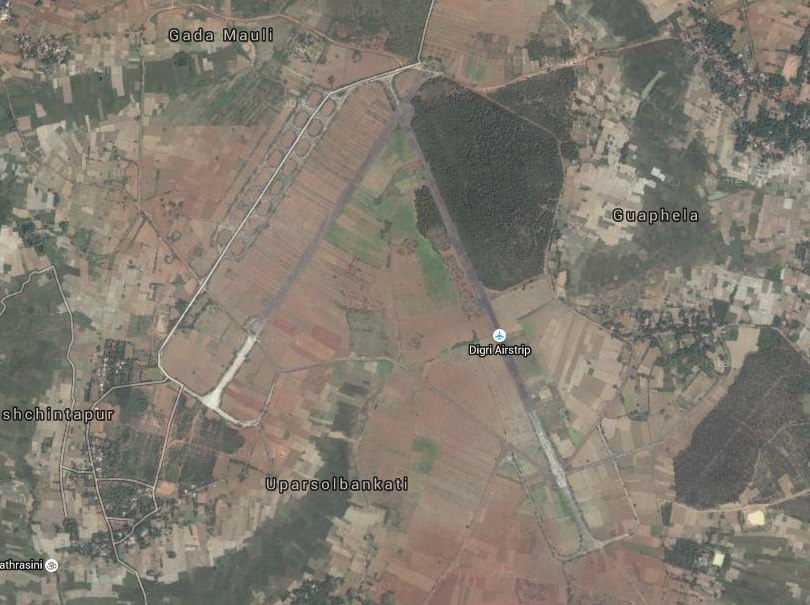
Check out the now abandoned Digri airfield in Google Maps and switch to ‘Satellite’ view.
Alternatively, here are the coordinates [copy/paste]:
22°46’55″N 87°21’45″E
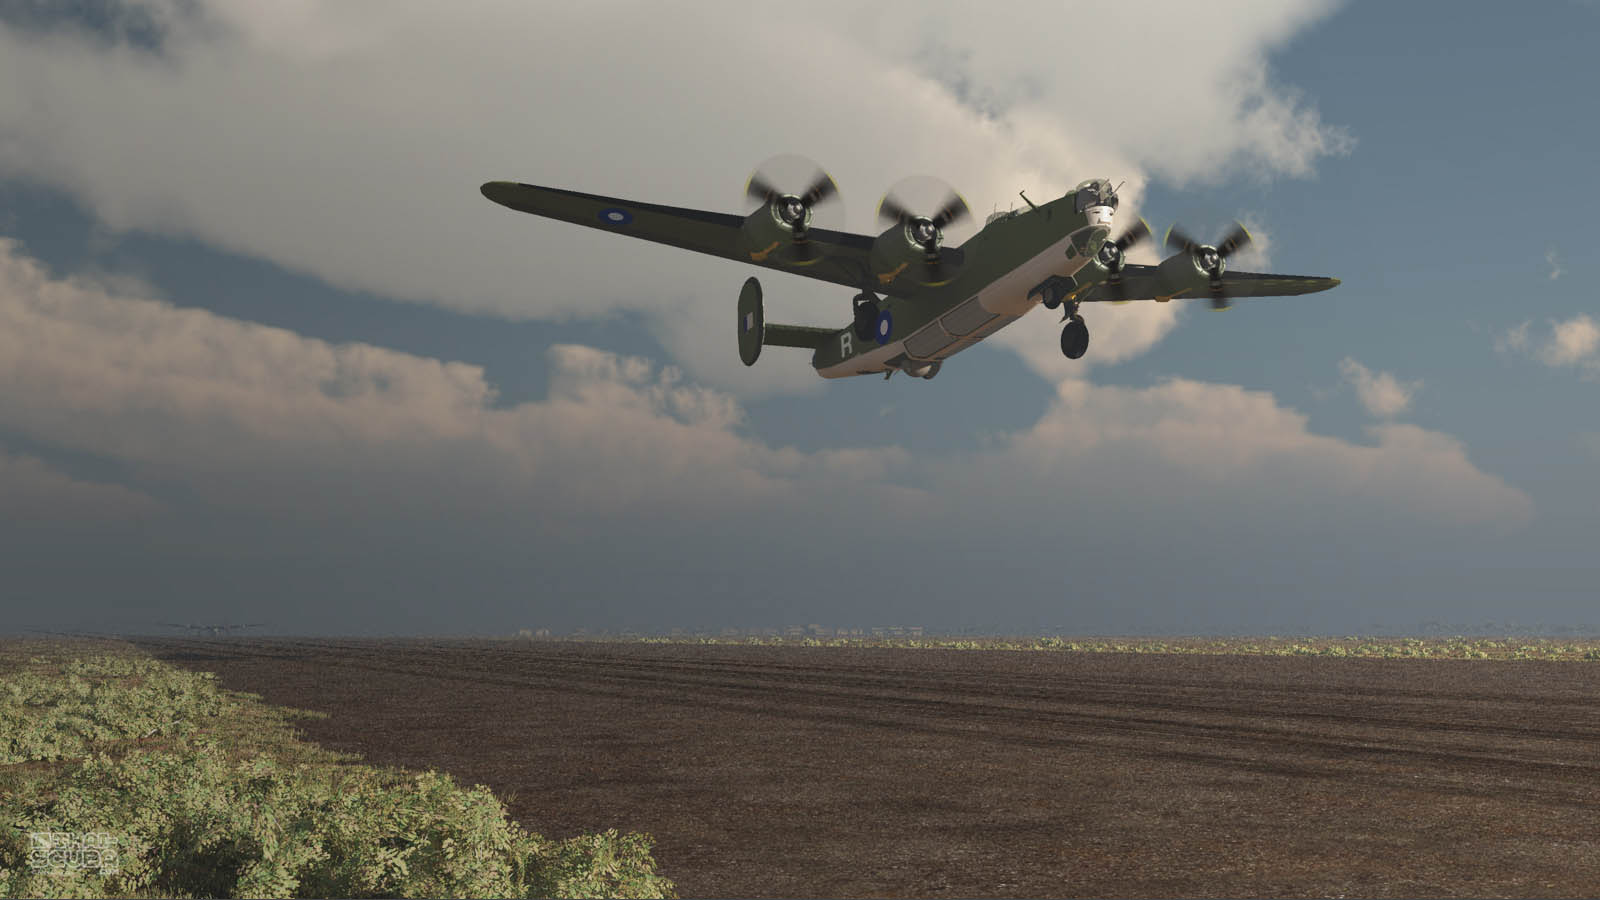
5) WHAT DID THE BOMBERS LOOK LIKE?
click to enlarge
-
B-24 Liberator Bombers
-
at over 18,400 units produced by the end of WW2, the B-24 bombers were the most commonly produced Allied bombers in history
-
the B-24 Liberator bombers under the RAF stationed around India were olive drab on top and off-white on the bottom
-
behind the side gunner ports, large letters marked each individual plane so ground crew and crew in the tower could easily identify them from a distance
Check out all about B-24 Liberator Bombers on Wikipedia.
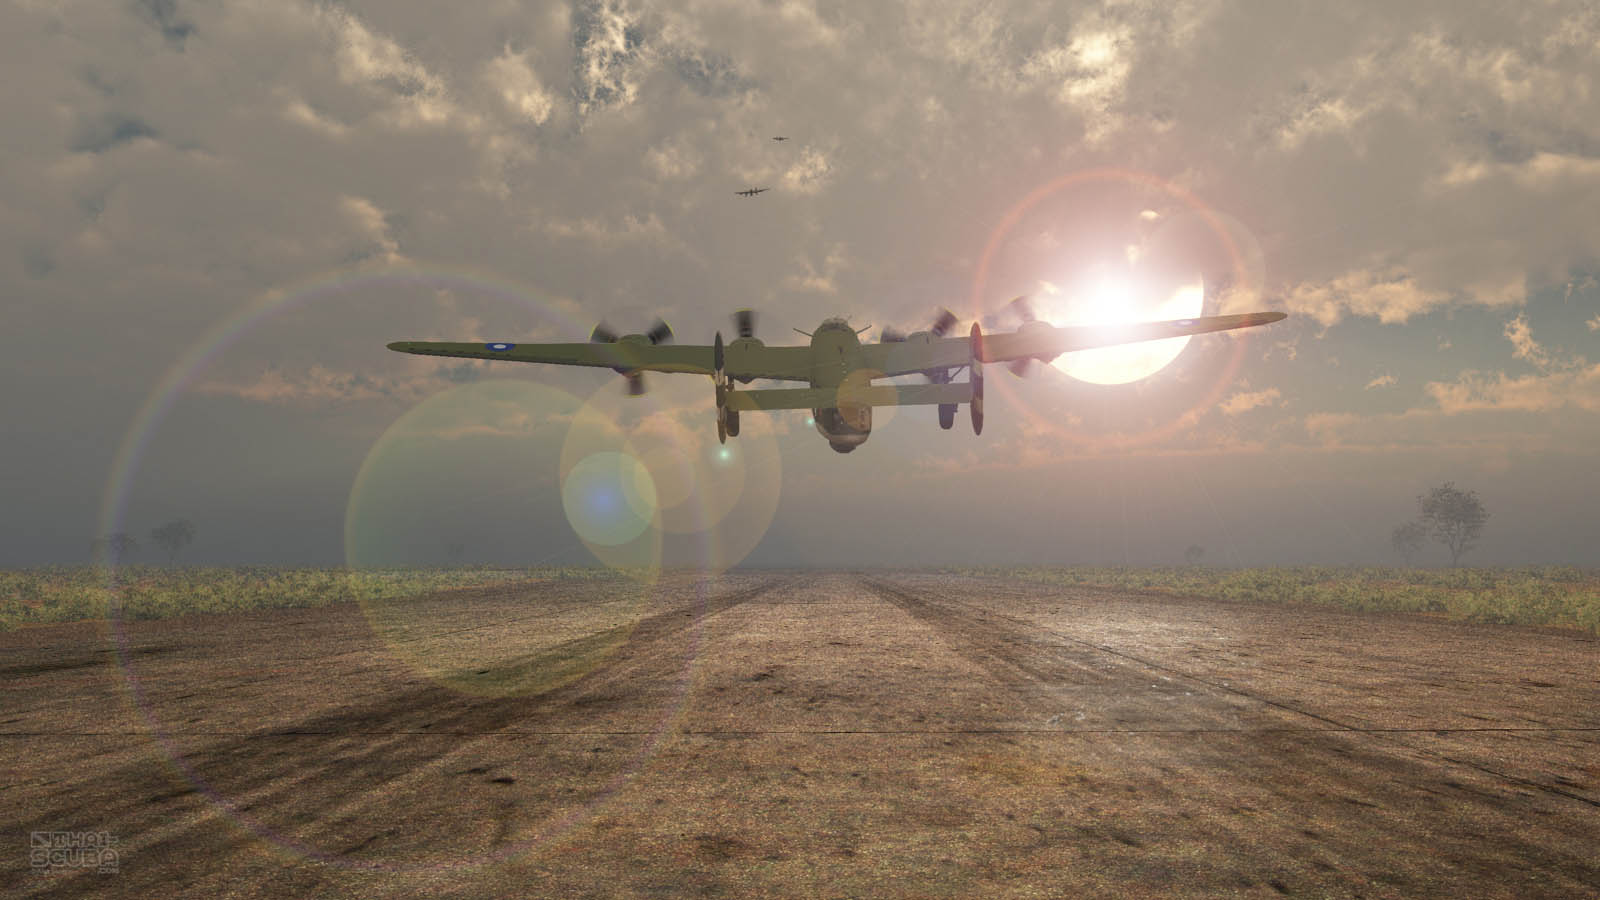
6) WHAT TIME DID THE ATTACK LAUNCH?
click to enlarge
-
Wing Commander Lucien Ercolani who would later on sink the Suddhadib took off at 5:41am
-
all other planes would follow in roughly one-minute intervals
-
the last plane of Squadron 159 was up in the air at 5:55am
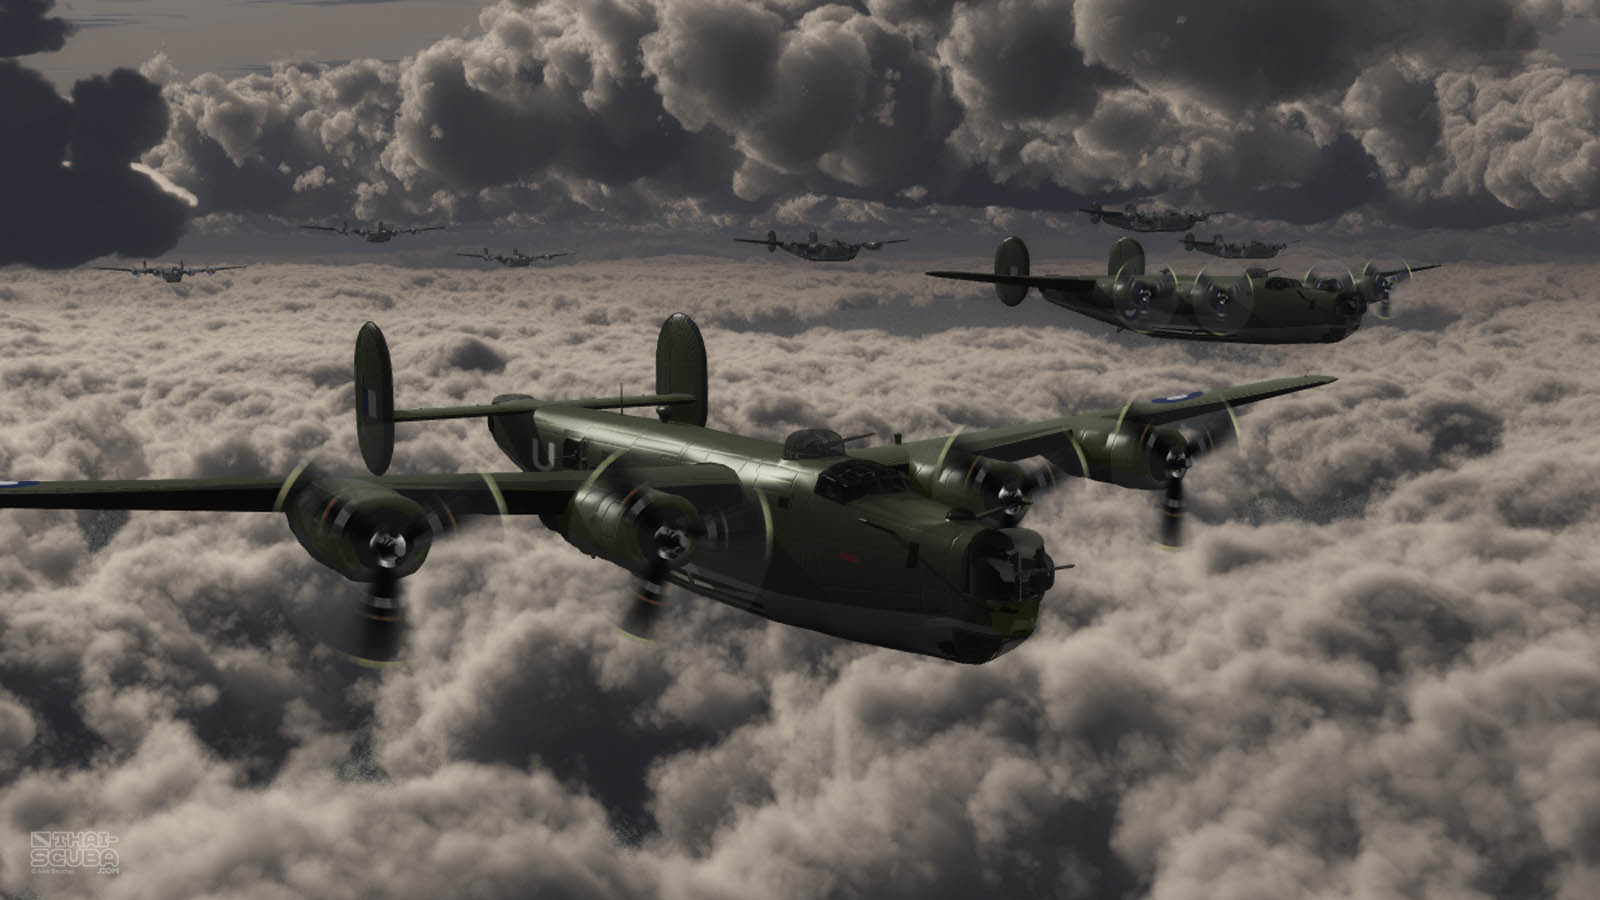
7) HOW WERE THE SQUADRONS SUB-DIVIDED?
click to enlarge
-
we have no information about the 10 planes of Squadron 99
-
Squadron 159 listed
– 5 high altitude bombers (marked A, K, D, V, B)
– 4 low-altitude bombers (marked T, R, J, C)
– 4 mine layers (marked F, H, Q, U)
- in the foreground of this picture you see the B-24 marked “U” piloted by Max Mazengarb
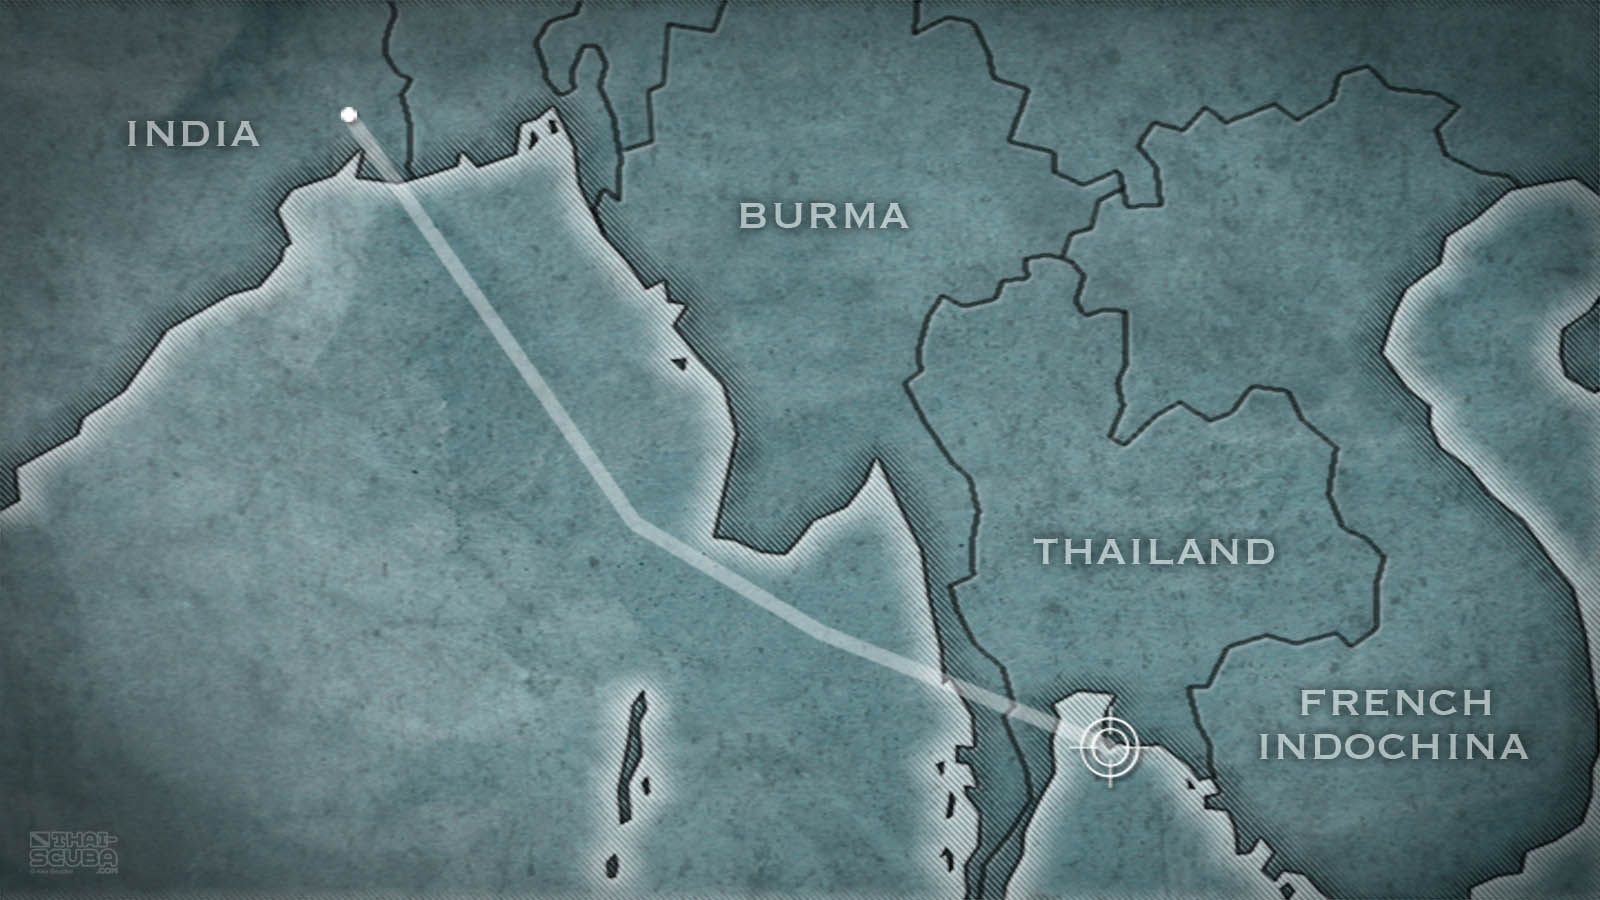
8) HOW LONG WAS THE FLIGHT TO THE TARGETS IN THAILAND ?
click to enlarge
-
the flight one-way took well over 6 hours
-
heavy monsoon rain and adverse flight conditions turned the flight into a “bumpy ride”
-
a number of crewmen lost their breakfast in mid flight…
-
the weather conditions actually forced one of the mine layer bombers (plane “Q”) to return to base before having reached the target area
9) WHAT FLIGHT ROUTE DID THE BOMBERS TAKE?
click to enlarge
- the flight path was most likely very direct but made sure to avoid unnecessary time over Burmese air space since the Japanese military had progressed into that area by that time and could have detected an approaching attack
10) WHAT WERE THE TARGETS OF THE ATTACK?

click to enlarge
-
actually, the main target of the attack was the HTMS Angthong anchored at Sattahip Bay
-
the high-level bombing attack on the Angthong began at 12:36pm
-
the Angthong was successfully hit by the high-level bombers after which all attention was diverted to the secondary targets:
– the S.S. Suddhadib and the HTMS Tachin
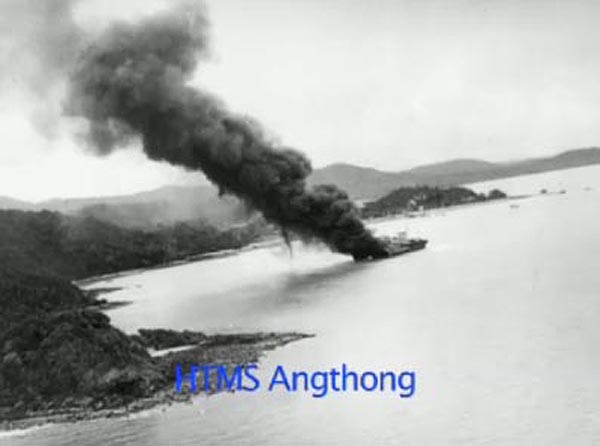
historical picture of the HTMS Angthong after her attack as researched by Peter Walker
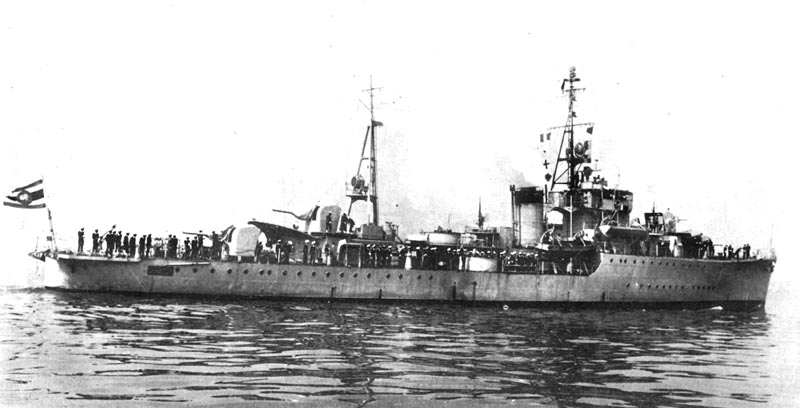
historical picture of the HTMS Tachin found at Axis History Forum
11) WHY WAS THE SUDDHADIB ANCHORED AT KO CHUANG?
click to enlarge
-
a first raid of the RAF Squadrons 2 days earlier (30th May 1945) had missed all targets
-
anticipating another attack, Admiral Kanok of the Royal Thai Navy then decided to disperse the vessels around the nearby islands rather than to keep all ships at Sattahip Bay (like the Angthong)
12) WHEN AND HOW DID THE ATTACK ON THE SUDDHADIB START?

click to enlarge
-
it must have been between 12:40 and 12:45 when the first high level altitude bombers locked on the Suddhadib as their target
-
the high-level bombing was conducted from an altitude of 5000 feet
-
the weather conditions at the target area were very nice with scattered high cirrus clouds, good visibility and light
13) WHY WAS THE SUDDHADIB CONSIDERED A TARGET?
click to enlarge
-
for over 20 years the Suddhadib had been a passenger and freight vessel
-
during the Second World War the Thai government decided to capitulate and co-operate with the Japanese (rather than risk being invaded by them)
-
all useable ships were subscribed by the Thai Navy to help the Japanese war effort and a large shipment of fuel drums aboard the Suddhadib was destined to support the construction of the “death railway” from Thailand all the way to India
-
England, stationed in India, was forced to halt this project and pre-empt any further Japanese advances
14) WHAT WAS THE PAYLOAD ON EACH PLANE?

click to enlarge
-
each of the 5 high-level bombers and 4 low-level bombers carried 5 1000lbs. M-59 bombs
-
although the B-24‘s bomb bay fits up to 8 bombs of that size, 5 bombs was the maximum on that day since extra fuel reserves needed to be carried for the extremely long round-trip flight
-
the 4 mine layer bombers carried various mines, mostly American MK-13 mines (in size and shape very similar to the M-59 bombs and a perfect fit for the B-24‘s bomb bay), one M-4 mine and British V11 mines

MK-13 mine | (picture by navweaps.com)
the rear half of an MK-13 mine can be found south of the wreck towards the beach of Ko Chuang at 22m depth

this mine lays between the wreck and the group of islands of Ko Rong Nang and Ko Rong Khon at 11m depth | (picture by Tyler Diaz)
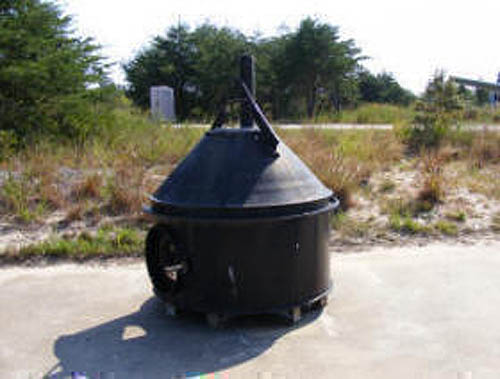
an M4 mine, most likely parachute deployed | (picture courtesy of fortmiles.org]
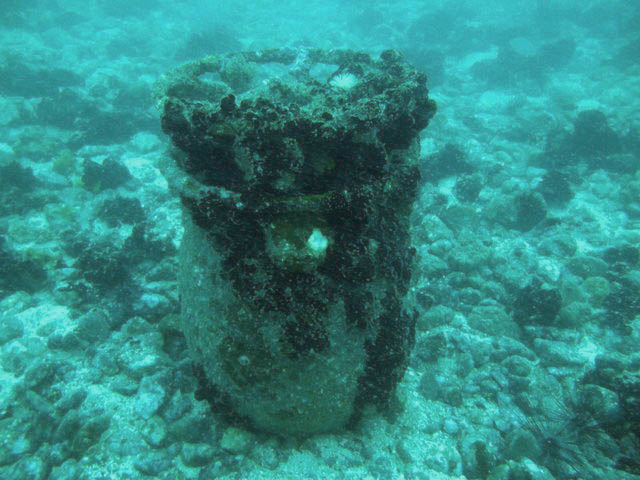
15) HOW DID AN M-59 BOMB ARM ITSELF?

click to enlarge
-
a tail fuse in the rear of the M-59 bomb contained a small propeller
-
once the bomb was dropped from a plane, the propeller started spinning in the air draft which pushed a pin into an arming mechanism
-
only after this process was the bomb armed
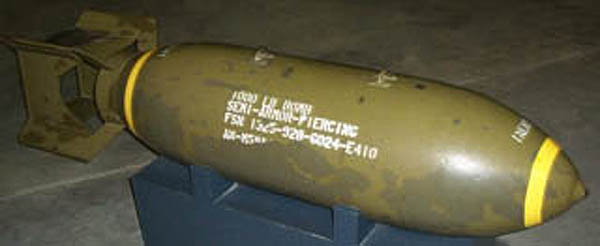
M-59 bomb | (picture by www.harpoondatabases.com)
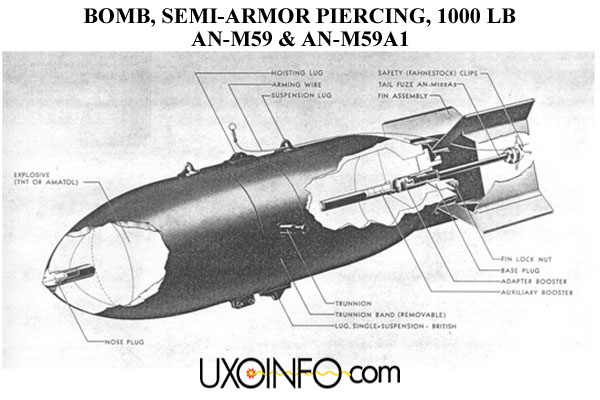
diagram of a M59 bomb | (picture by uxoinfo.com)
unexploded M59 bomb west of the wreck at 28-30m
16) DID THE BOMBS FALLING ON WATER EXPLODE OR SINK?

click to enlarge
-
there are a number of unexploded bombs around the Suddhadib wreck but very likely none of those originated from the high-level drops – all must have gone off
-
the high-level bombs were set to detonate 0.25 seconds after impact
-
inertia switch inside the bomb – as soon as the outer shell gets slowed down, a sliding mechanism inside continues moving forward in the original speed and causes the detonation
17) DID THE HIGH-LEVEL BOMBS HIT THEIR TARGET?

click to enlarge
-
no, all high level bombs missed the Suddhadib
-
high-level bombing is gambling at best
-
the high-level drops that hit the Angthong only minutes earlier were mostly luck
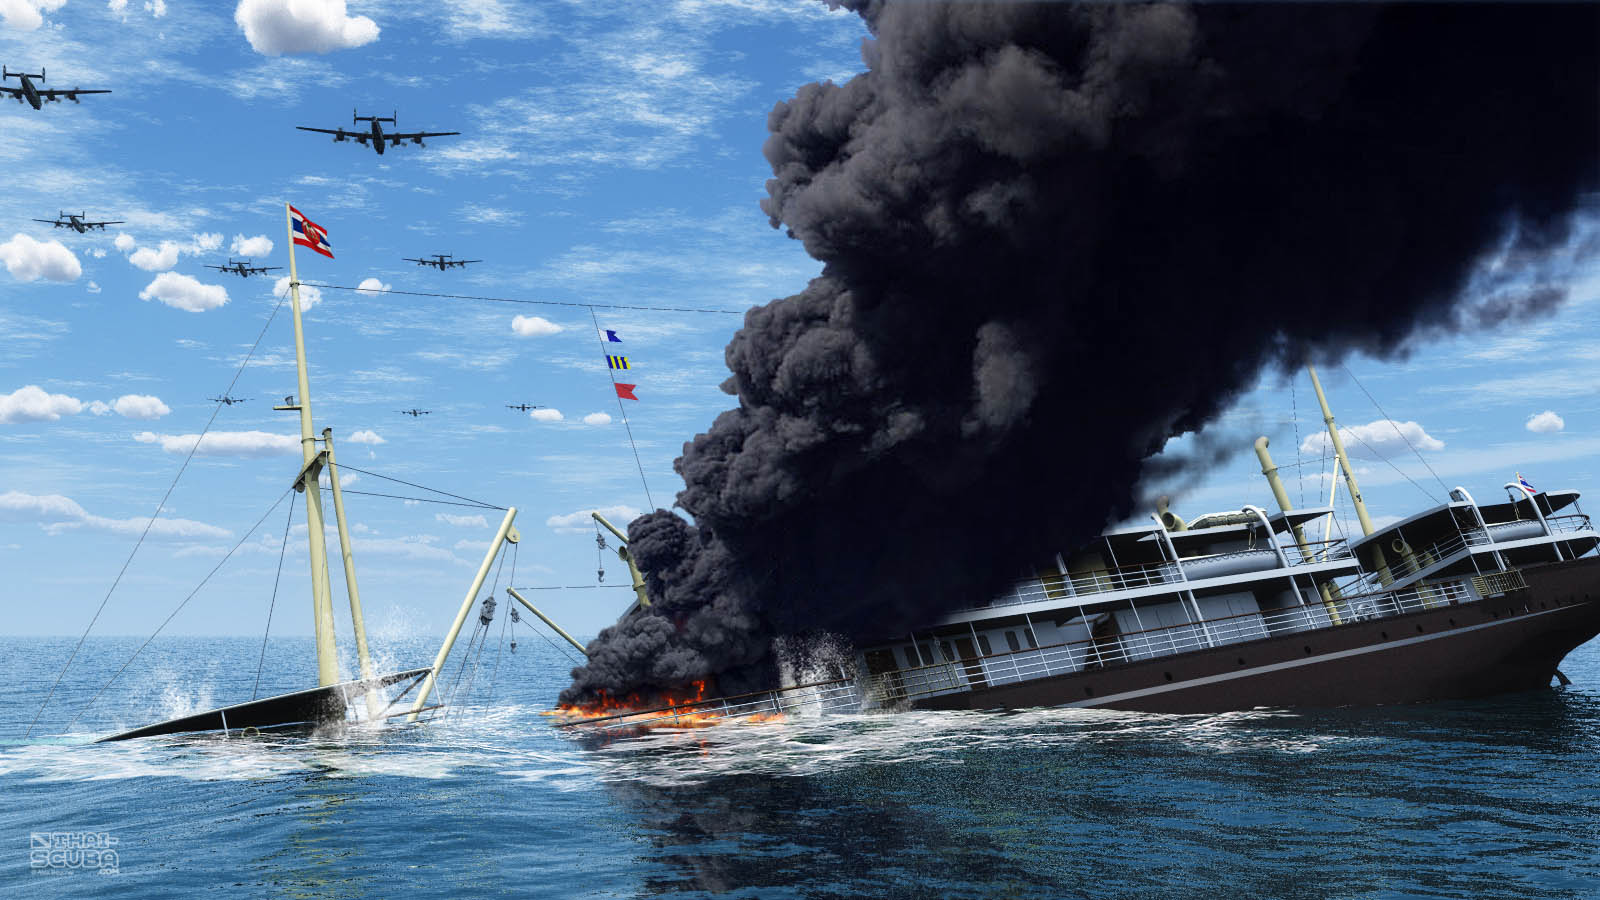
18) WERE THERE ANY CASUALTIES?
click to enlarge
-
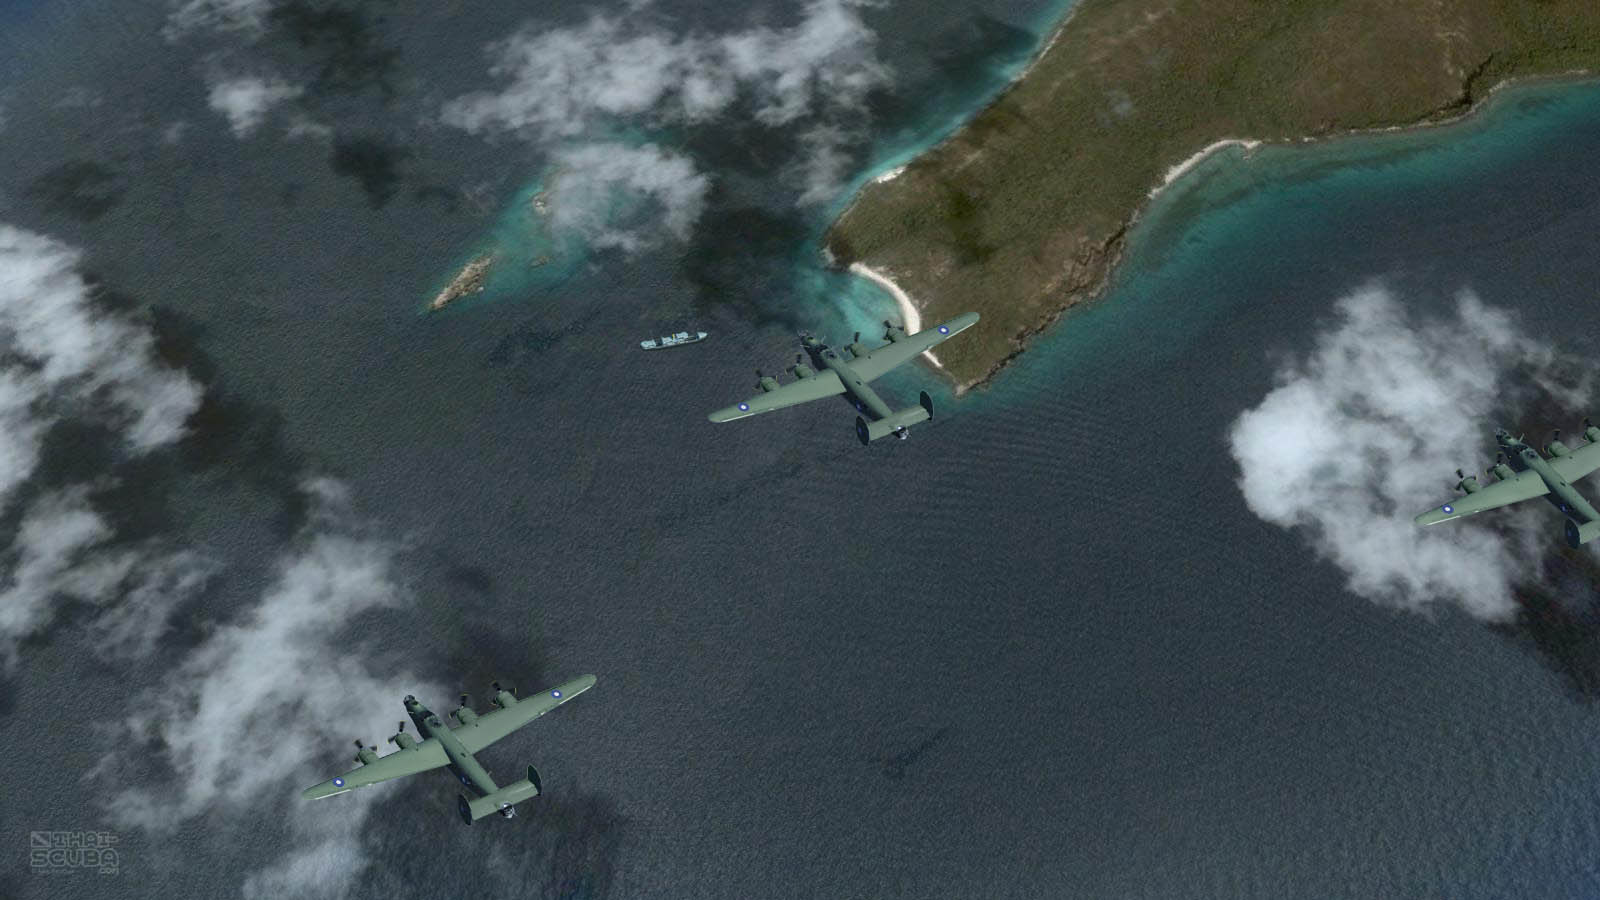
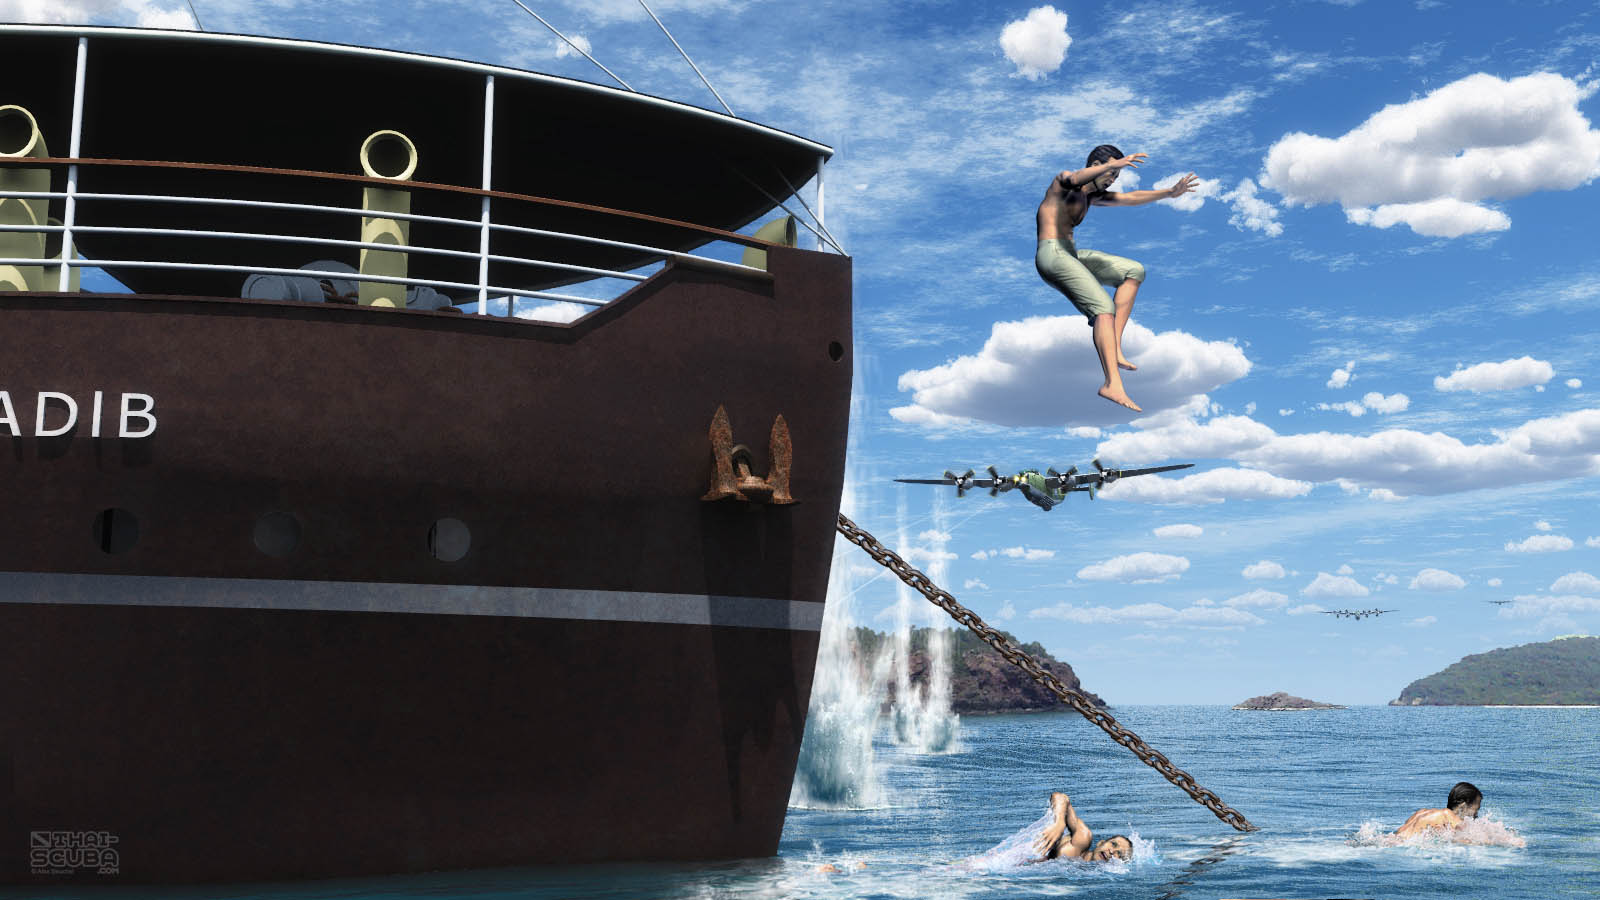
all 15 crew men of the Suddhadib jumped over board and swam over to Ko Chuang – none of them were harmed
-
in the picture you see the second attack wave: the low-level bombers approaching the Suddhadib from a south-east direction
19) WHAT HAPPENED AT THE LOW-LEVEL ATTACK?

click to enlarge
-
the plan for the low-level attack wave was a technique known as “skip bombing”
-
bombs were dropped at very low altitude and rather than sinking, they skipped on the water surface like a “skipping stone”
-
is was planned for a bomb to eventually hit the side of the ship, sink and explode underneath
-
the low-level bombs were timed to detonate 11 seconds after the first impact (water or ship)
-
crew members of the Squadron reported of bombs actually skipping over the Suddhadib!
Check out Wikipedia for all about “Skip Bombing”
20) DID THE SUDDHADIB DEFEND ITSELF?

click to enlarge
-
the Suddhadib had hardly any anti-air defense (if any at all) and ‘although sailing under a Thai Navy war ensign’ was still just a civilian freight ship
-
all crew had abandoned the ship by now
-
she was a ‘sitting duck’
-
this picture shows the view from the cockpit approaching the ship
-
the front gunner fires away on a defenseless target (hey, you wold do the same after flying here for 7 hours…)
21) WHO SANK THE SUDDHADIB?
click to enlarge
-
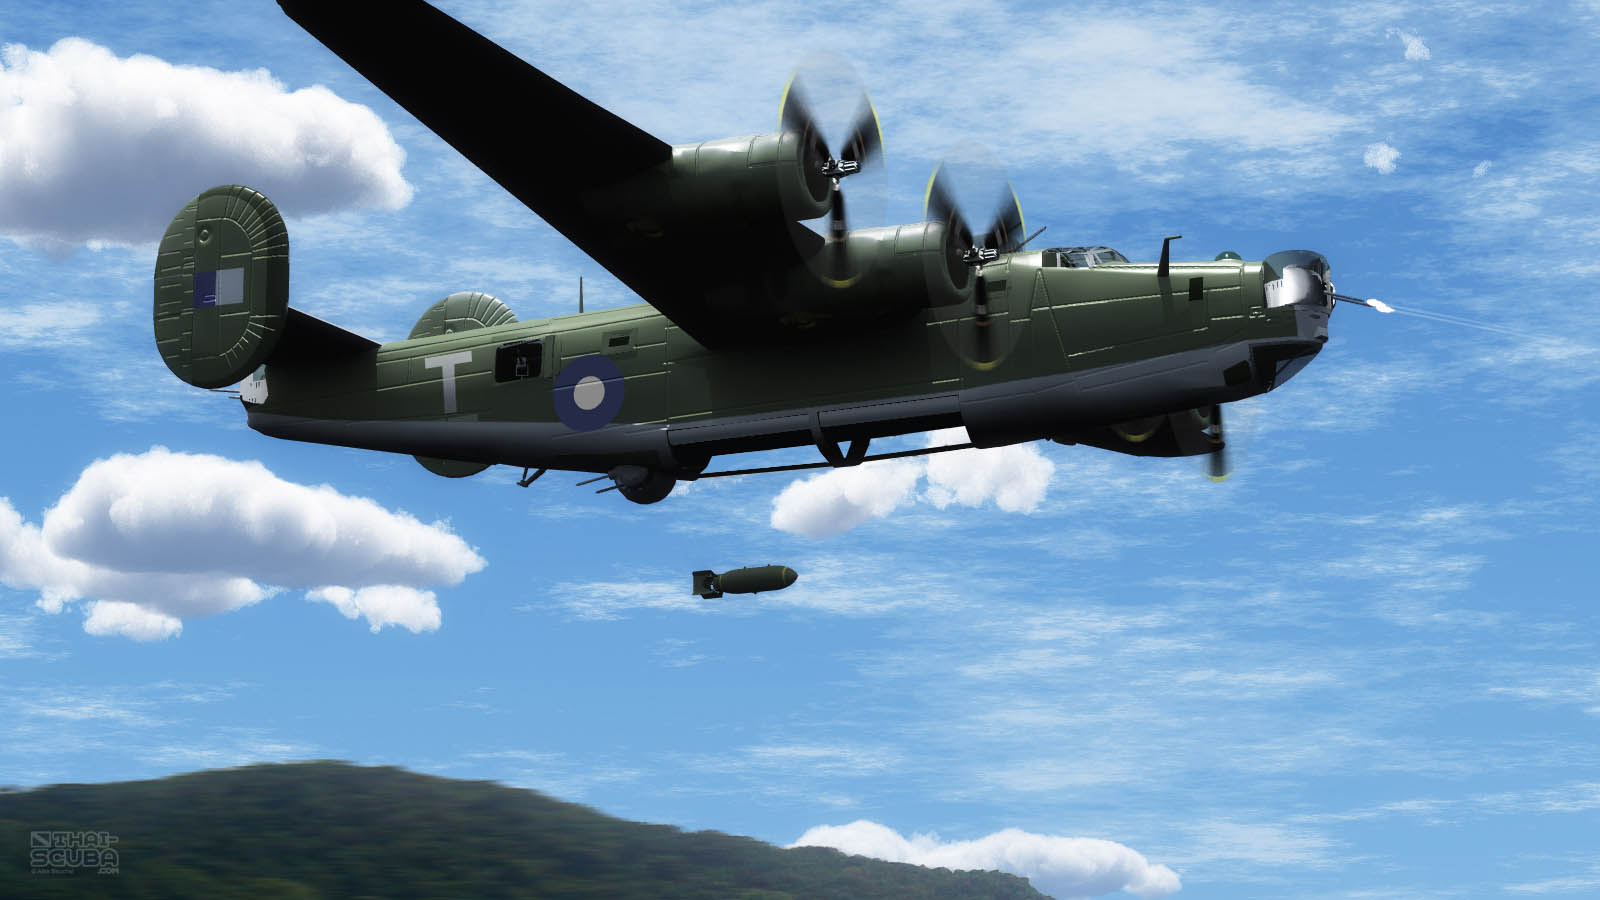
Wing Commander Lucien Ercolani with his low-level bomber marked “T” was the one who dropped the bomb which brought down the S.S. Suddhadib
-
the front gunner in the front turret continues firing
Here the interesting view inside a B-24‘s bomb bay with M-59 bombs loaded – parked on an air field. Imagine the balancing act of a crew member walking from one end to the other in mid flight with the bomb bay open like this.
Check out more interior and exterior pictures of B-24 bombers like this at www.air-and-space.com
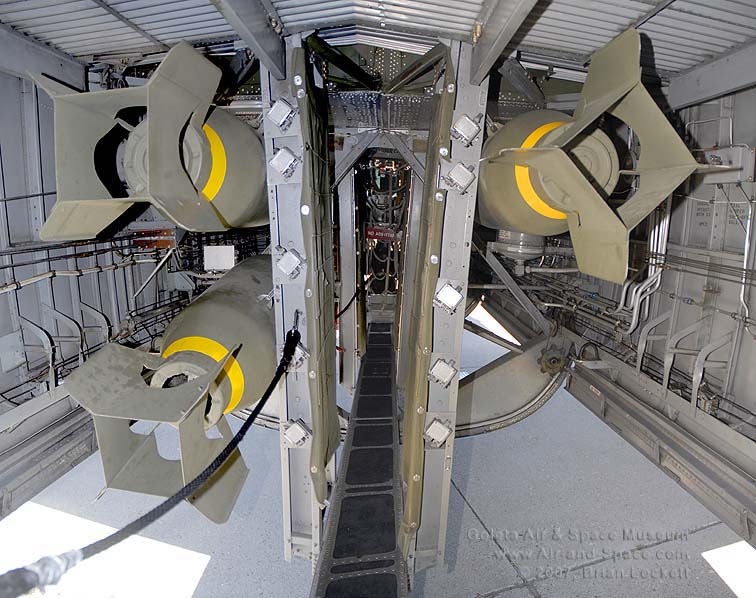
picture by Brian Lockett
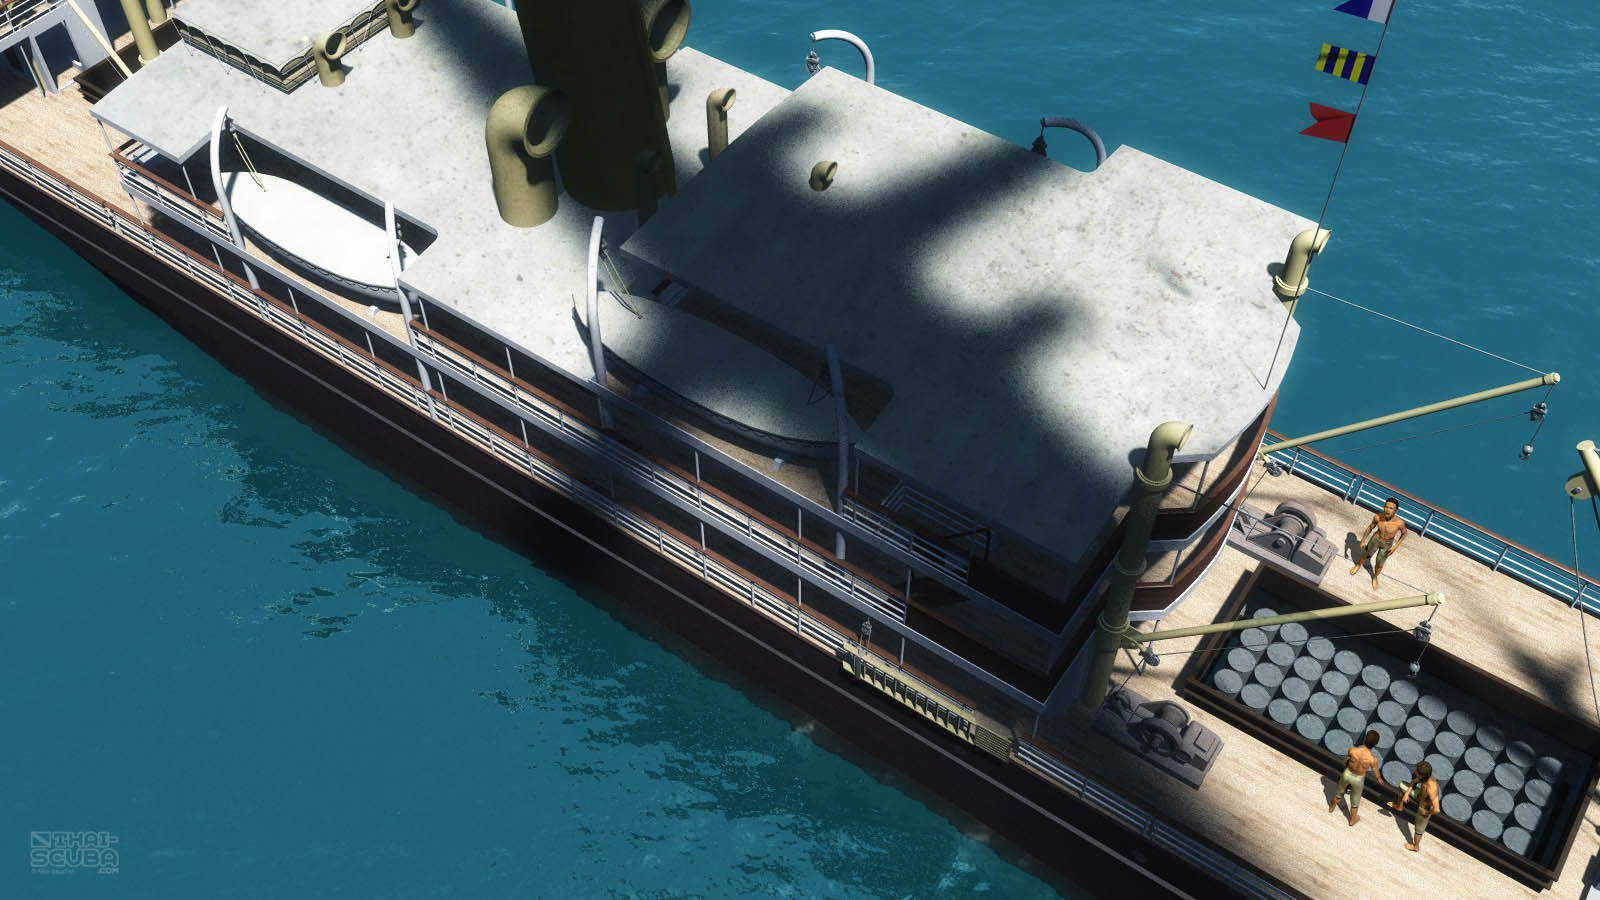
22) WHERE DID THE BOMB HIT THE SHIP?
click to enlarge
-
the bomb dropped into the forward cargo hold which was loaded with a large shipment of fuel drums
FYI: although ‘a big hole in the hull’, the hole in the engine room on the port side of the wreck (which is now the ‘top of the wreck’) is not bomb damage but was a purpose cut, rectangular opening to crane up and salvage the steam engine which (I’m sure you noticed) is no longer in the wreck
23) WHAT DAMAGE DID THE BOMB DO?
click to enlarge
-
the fuel drums exploded – however, the bomb did not!
-
had the bomb exploded on board, the destruction to the ship would have been massive and the wreck would not be in the shape we find it today
-
the bomb most likely penetrated the hull from the inside and shot out the starboard side
-
it is to be assumed that the tail fuses of the bombs never had proper time to arm themselves before they hit the water or the ship which also accounts for the multitude of other unexploded 1000lbs. bombs around the wreck in the direction of the flight path (North-West)
UNDERSTANDING BOMB FUZES
A number of tail fuzes were compatible with the M-59 bombs and we don’t know for sure which ones the Squadrons had used for their attack.
Here an interesting historic document (click on picture) about tail fuzes for various bombs (big PDF file/ slow loader…).
Many of them required an air travel distance of several hundred feet before properly arming the bomb. Dropped at an altitude of only 150 feet our bombs’ tail fuzes may have never had the necessary time to arm.

24) WHAT HAPPENED TO THE BOMB AFTER IT HIT THE SHIP?
click to enlarge
-
like many other low-level bombs on that day it sank to the ocean’s floor – unexploded
25) WHAT CAUSED THE SUDDHADIB TO SINK?
click to enlarge
-
although the bomb did not explode on board and the damage was relatively ‘minimal’, together with the blast of fuel explosion on board it was enough to bring the ship down
- the bomb itself may have created a hole as it pierced through the hull from the inside
-
seams in the hull’s plates must have burst and shifted and allow water to penetrate the hull instantly
-
whatever damage it was, it happened on the starboard side which is now the underside of the wreck and is buried under 2m of rubble and sand so it will never be properly visible on a dive
OUR STRONGEST PIECE OF HISTORICAL EVIDENCE:
the picture taken out of the rear of W/C Ercolani’s plane just seconds after the bomb had hit

historical picture researched by Peter Walker
What can we learn from this photograph?
-
the picture was taken from an altitude of just under 150 feet/ 50m (take the length of the 70m long ship as a ‘ruler’ and stand it up vertically; the ruler crosses the horizon (our eye line) at around 50m which is the altitude of the camera lens); this must have also been the altitude the bomb was dropped from
-
the flight path was from South-East to North-West
-
the bomb did definitely NOT explode on or inside the ship (in which case the blast would be huge with debris and parts of the ship flying through the air)
-
the smoke mushroom is definitely from a fuel explosion happening inside the forward cargo hold (a big fire ball forms at the blast site which then rises and leaves a thinner smoke trail behind; as it rises the fire inside the fire ball fades to leave only smoke; as reference, view a video of a fuel explosion here on YouTube)
-
the picture was taken about 5 seconds after the fuel explosion
-
there is a large patch of foam on the starboard side of the forward hull
26) WHEN DID THE SUDDHADIB SINK?
click to enlarge
-
she sank at 12:55pm with a forward-starboard tilt
-
after a very successful air raid (all targets had been hit) the RAF B-24 Liberator Bomber Squadrons returned home to India (they would arrive at the base between 19:34h and 21:19h after a total flight time of up to over 15 hours non-stop)
The illustration above is a reverse angle of the historical photograph of the ship sinking taken from one of the planes as researched by Peter Walker

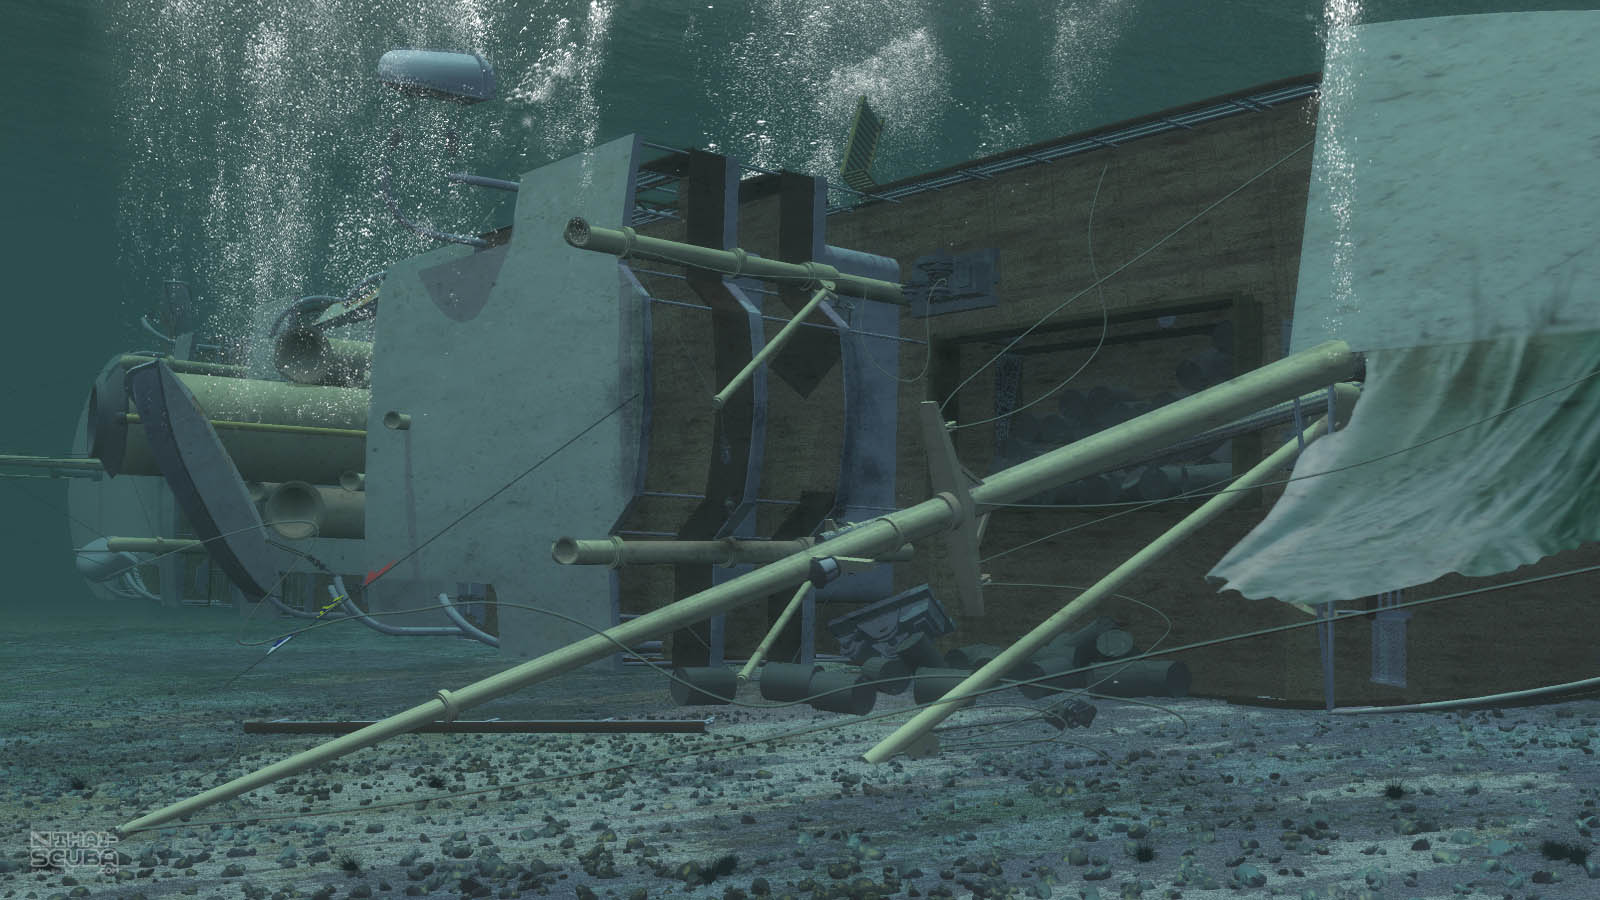
27) DID THE SUDDHADIB GO TO HEAVEN?

-
nope…
-
she came to rest on her starboard side at a depth of around 25m, the sea urchins have been chewing on her ever since and hordes of scuba divers penetrate her on a daily basis (try getting some rest like this…)
-
a number of unexploded bombs from the low-level attack still rest on the ocean’s floor, some quite a distance away
-
the one we believe might be ‘the One’ lies 28m away from the wreck in a western direction
click to enlarge
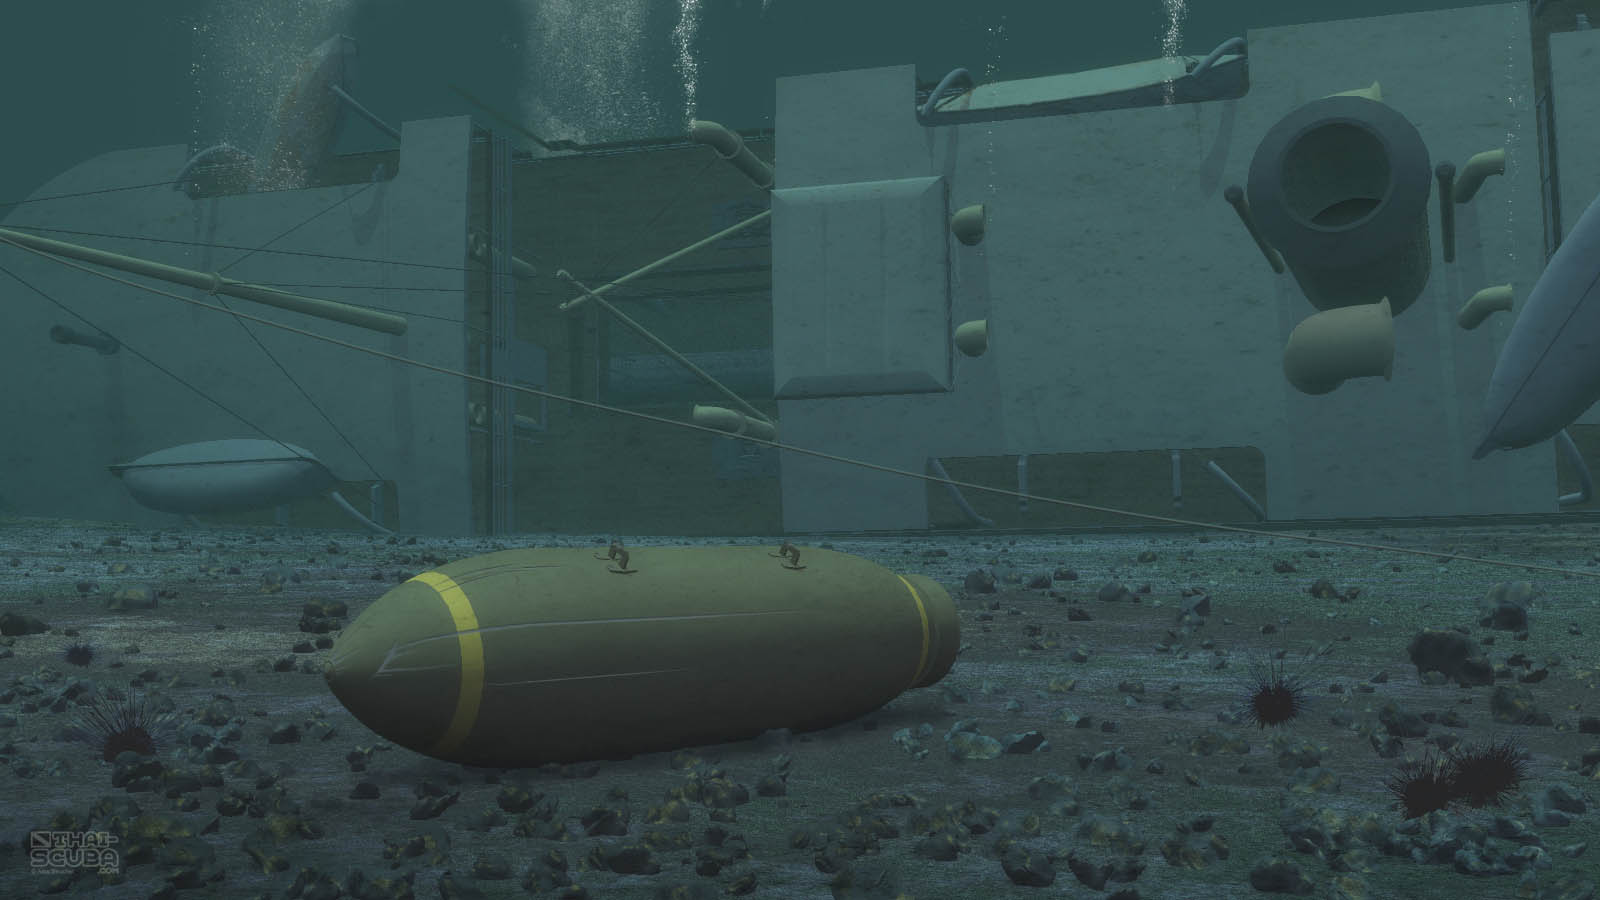
The bomb near the Suddhadib Wreck which is in perfect alignment with the flight path going over the forward cargo hold.
DISCLAIMER
Completing the 29 digital illustrations took months of my spare time to complete and I am sure after reading this page you understand that I was very keen on getting even the smallest detail right.
All the information given above is to the best of my knowledge, conceived in close consultation with Peter, Brock and Steve and with credits given to where they belong.
However, some things will never be revealed entirely and others might have happened differently as described.
The key issue that is still hard to nail down were the clues given in Peter’s photograph of the fuel explosion (above). We all agree on the points listed in the gray box (“What can we learn from this photograph”), and agree the scenario described above is ‘a plausible interpretation of the events’. Although Brock and Steve subscribe to the course of action like this, Peter does not want to give up the possibility that a bomb might have gone off near the ship after sinking to the bottom of the ocean which may have caused just minor damage to the hull but enough to bring her down.
Brock reckons an explosion of a 1000lbs. bomb from underneath would lift the ship up and break it in half while Steve concludes, to really know we would just have to clear and airlift tons of coral and sand from the area. 🙂
It is difficult to conclude ‘for sure’ but we trust the work that went into this project is helpful, insightful and interesting to all scuba divers that visit the wreck, as well as people interested in the history of both the Suddhadib and the RAF Bomber Squadrons.
If you have any further clarifications or better evidence for any of the details, please mail them to me at thaiscubacom@gmail.com or leave comments at our Facebook Fanpage and they will be included in an updated version of this page here.
Alex Beuchel
Bangkok, February 2012